Reuben:

No, the deck is not solid fiberglass. In most cases it is comprised of a sandwich construction with plywood between a heavier fiberglass deck and thin inside liner. I understand that later models of the boat utilized a foam core which would not have the problem of core rot but I don't know when that change occurred. What year is your boat?

In my case the plywood separated from the deck skin resulting in a soft deck that would flex when you walked on it. I thought that the soft deck was due to rot in the core so I cut the duck in half immediately in front of the cabin, removed the bow section of the deck entirely, separated the liner, removed the core and replaced it with marine plywood encased in epoxy and then reinstalled the unit. This gave me the chance to examine the core construction in detail. What I had is not necessarily what you would have. My boat is a 1976 and clearly boats of that vintage were not built to the standards of  later boats. Apparently these early boats were built by contractors who I can attest cut many corners.

In my case the core was the cheapest plywood (i.e., not even exterior) with large voids. The layers of the plywood had separated and the plywood itself was attached to the deck skin with occasional strips of some sort of sealant which had long past let go. I could remove the core with my hands.

Except for one area of about 1' square where the head air vent came through the deck there was no rot so the extreme measures I took turned out to be unnecessary. Carefully injecting epoxy into the core might have been sufficient. The problem was that until you look inside the deck, you it is difficult to know what is wrong or how well the injection process is working.

Knowing what I learned from the deck reconstruction I was able to use the injection method quite successfully on the side deck - so far as I can tell. By looking at the core from where the deck was removed I could tell that delimitation had occurred there as well but without any sign of rot. Knowing what the problem was I was able to inject thickened epoxy into the core without going through the core - in which case the injected epoxy would have simply pooled in the space between the core and the liner. The liner is solidly attached to the core on the cabin top but not the side decks. By avoiding this problem I could inject the epoxy into one hole until it came up through the next hole giving me a pretty good indication that most of the voids in the plywood and the space between the core and the deck skin were filled.

By removing the solar vent in the cabin top I was able to see that the core, at least in that area, appeared to be solid. Certainly there was not flex in the deck there so I concluded that I could leave the cabin top as is.

I am not telling you this because I think that this is something you should do - quite the contrary - it is simply to describe what the core was like for my vintage of boat. I have posted pictures of the process and the state of the core in previous times but if you or anyone would like to see them and can't find those pictures in the archive I would be happy to post them again.

Whenever a bolt is removed from a deck it is a very good idea to determine whether water has made its way into the core and to also ensure that the hole is property sealed with epoxy before the bolt is replaced. If water is coming into the boat there is an excellent chance that it was also making its way into the core unless the hole was previously prepared properly.

The best way to prepare the hole that I have seen is to enlarge the hole going through the core without enlarging the hole in the fiberglass deck and liner skins. I did this using a dremmel bit that looks like this: https://www.leevalley.com/en-ca/shop/tools/power-tool-accessories/burrs/31016-hss-carvers-burrs . It has a shank that is about 1/8" and a cutter cylinder that is about 1/4". The bit will fit through the deck hole and then by moving it around you remove wood creating a hole below thr surface that is about 5/8". Check the wood dust that is removed to see if it is wet or appears rotted. If there are signs of rot/water, try remove more of the core to get back to good wood. If you still have signs of rot you might need to consider a more extensive fix.

Put tape over the hole on the inside liner and then coat the hole with un-thickened epoxy and then pack it with thickened epoxy. Once the epoxy is set re-drill the hole for the bolt. In my experience it is MUCH easier to drill the hole when the epoxy is set - solid but not sticky - but before it cures completely. In this semi-cured state drilling straight through is much easier. Once cured, the epoxy is much harder than the surrounding material and the drill bit will want to wander. Using a brad point bit also helps. This gives a solid and waterproof plug between the deck and inner skins.

All this is a bit fussy but not difficult to do and gives you reasonable assurance that the deck core is protected. You really really want to avoid having to replace sections of the core.


Graham Stewart
Agile, Rodes 22, 1976
Kingston Ontario
-----Original Message-----
From: Rhodes22-list [mailto:rhodes22-list-bounces at rhodes22.org] On Behalf Of Reuben Mezrich
Sent: Wednesday, March 10, 2021 6:15 AM
To: The Rhodes 22 Email List
Subject: Re: [Rhodes22-list] Leak at the bow....where to look first
Graham
thanks for the suggestions on watching for creep and cleaning up the
butyl...haven't seen it yet but I'll look as it gets warmer down here in
Sarasota.
As to the deck, to be honest I didn't think to look for damage. I don't
know what the deck is made of...it looks and feels solid. At the hole for
the solar vent I could see the deck in cross-section and it sure looks like
solid fiberglass nearly one inch thick...is that possible?
--Reuben
Reuben Mezrich
Pelican Cove in Sarasota
Cell: 410-499-8922
On Tue, Mar 9, 2021 at 11:42 AM Graham Stewart <gstewart8 at cogeco.ca> wrote:
> I love butyl tape and use it everywhere that does not require adhesive
> properties or below the waterline. It seals beautifully and also allows the
> removal of the hardware easily.
>> BTW, to clean up squeeze out you can get most of it off by using a small
> ball of butyl that will stick to the squeeze out and lift most of it. The
> remaining bits can be cleaned up easily with turpentine. You may find that
> the squeeze out will continue to flow for a very long time.
>> Did you consider whether there might have been any damage to the core oy
> your deck from the water? I would be concerned about that especially if the
> core is wood.
>> Graham Stewart
>gstewart8 at cogeco.ca>>>>>>>> -----Original Message-----
> From: Rhodes22-list [mailto:rhodes22-list-bounces at rhodes22.org] On Behalf
> Of Reuben Mezrich
> Sent: Tuesday, March 9, 2021 11:25 AM
> To: The Rhodes 22 Email List
> Subject: Re: [Rhodes22-list] Leak at the bow....where to look first
>> After receiving the many excellent suggestions on where to look for leaks I
> started what ended being a 1 week process to find and ultimately repair the
> leak.
>> I first removed the cosmetic wood trim inside the forward cabin at the bow
> to expose the attachments of the Jib chainplate and the Bow eye. I sprayed
> water at the bow and determined these were not the source of the leaks. I
> then sprayed water on the foredeck and initially saw no water leaking into
> the boat but when I came back to the boat the next morning found that some
> water (about 1 - 2 cups) had collected at the bow (By now I had removed the
> cushions and so could see the water in a puddle on the floor of the forward
> bunk at the bow). I had some sort of a slow leak.
>> I then had my wife spray water on the foredeck while I was on my back in
> the forecabin and was able to see that there were leaks at each of the four
> legs of the pulpit. The leaks would drip onto the carpeted shelf that is at
> each side of the forecabin (behind a white fiberglass trim piece) and then
> the water would slowly make its way forward to trickle down at the bow end
> of the forecabin.
>> The pulpit is attached by 3/8" bolts that are welded to each of the legs
> and which extend down through holes in the deck and fastened with a flat
> washer, lock washer and 9/16" nut. After unfastening the nuts the pulpit
> lifted up easily. One complication is that the electrical wires that feed
> the navigation lights at the bow extend through a seperate hole just
> forward of the hole for the aft-starboard bolt. That wire seems to run back
> to the distribution panel and has very little slack and so I had to cut
> it. When I did remove the pulpit I found there was some white sealant that
> adhered to the deck but not the pulpit leg (which ends in an oval flange at
> the bottom) as well as an O-ring around the base of the bolt.
>> After consulting with Stan, who told me that his preferred method for
> keeping water out is to just use an O-ring around the nut (and not to apply
> sealant), I cleaned off the old sealant (a product called ReMov which was
> recommended in a Practical Sailor review, worked great for this) I put new
> O-rings on. Rather than putting an O-ring around the electric wire near the
> aft-starboard leg I put some wraps of butyl rubber tape abound it.
> I reattached the pulpit, tightened the nuts and had my wife spray the
> foredeck again and sadly found that there was again a leak (perhaps even
> worse than before) at each leg - but not where the electric wire entered
> the cabin.
>> I removed the pulpit again, removed the o_rings and this time used Butyl
> tape to form the seal at each leg. Using a technique I found on You Tube I
> cut a 3 - 4 inch length of the tape, rolled the tape along its length into
> a tube (or rope) and then wrapped it several times about the base of the
> bolt. The thickness can be adjusted by adding more or less wraps and I was
> generous, using the entire 3 - 4 inch tape at each leg. I added more Butyl
> to the electric wire.
>> After putting the pulpit back in place and only moderately tightening the
> nuts, my wife sprayed the foredeck again and this time - success - no
> leaks!!
>> I have become a big fan of Butyl rubber tape, which to be honest I hadn't
> even heard about till last week!
>> Of course now I have to splice back the electric wire for the navigation
> light and replace the cosmetic wood trim I removed, but I am much relieved
> that this problem is solved
>> Thanks for your advice and support
>> --Reuben
> Reuben Mezrich
> Pelican Cove in Sarasota
> Cell: 410-499-8922
>>> On Tue, Mar 2, 2021 at 12:49 PM <cjlowe at sssnet.com> wrote:
>> > I like to tape paper towels around the suspected areas and see which ones
> > show moisture first, then investigate further from there .
> >
> >
> > Jerry Lowe
> > S/V Country Rhodes '86
> >
> >
> >
> >
> >
> > > Roger, Rob and Mike
> > > Thanks for the good suggestions. I'll start by taking off that
> > cosmeticsus
> > > piece of wood at the bow and see what's behind. If nothing is loose
> I"ll
> > > have someone aim a hose at the bow while I"m inside watching in the
> hope
> > > that I might actually see where the water is getting in.
> > > I really do hope I don't have to rebed everything.
> > > Probably won't be able to do this till the weekend..I"ll report back on
> > > what I find
> > >
> > > Reuben Mezrich
> > > Pelican Cove in Sarasota
> > > Cell: 410-499-8922
> > >
> > >
> > > On Mon, Mar 1, 2021 at 5:15 PM Michael D. Weisner <mweisner at ebsmed.com> >
> > > wrote:
> > >
> > >> Reuben,
> > >>
> > >> I would check the bow eye. The wood backing block usually rots and the
> > >> eye
> > >> loosens up. Sometimes just lifting the boat using the bow eye will
> cause
> > >> the eye to loosen as the wood compresses.
> > >>
> > >> Also, you may want to re-bed the bow pulpit rail deck fittings,
> chocks,
> > >> etc.
> > >>
> > >> Mike
> > >> s/v Wind Lass ('91)
> > >> Nissequogue River, NY
> > >> I’d rather be sailing :~)
> > >>
> > >> -----Original Message-----
> > >> From: Rhodes22-list <rhodes22-list-bounces at rhodes22.org> On Behalf Of
> > >> Reuben Mezrich
> > >> Sent: Monday, March 1, 2021 4:08 PM
> > >> To: The Rhodes 22 Email List <rhodes22-list at rhodes22.org>
> > >> Subject: [Rhodes22-list] Leak at the bow....where to look first
> > >>
> > >> As I mentioned a week or two ago, I installed a Marinco 3" Day/night
> > >> solar
> > >> vent at the bow, using the hole already in place for the anchor
> locker.
> > >> It
> > >> installed easily, seemed to work fine but a few days later we had a
> > >> heavy
> > >> rain and the next day the forward tips of the forward cabin cushions
> > >> were
> > >> wet. I removed the vent, replaced the deck plate, installed a new
> gasket
> > >> under the deck plate, applied a generous amount of RTV silicone to
> both
> > >> sides of the gasket and reinstalled the solar vent. The next day
> > >> (yesterday
> > >> actually) I used a hose to rain water on the forward deck, aiming at
> the
> > >> solar vent for about 6 minutes and when I checked below everything was
> > >> dry.
> > >> I checked again in an hour and it was still dry.
> > >> This morning there was about a cup of water, maybe two cups of water
> at
> > >> the bow. There was no water in the tray that serves as the anchor
> locker
> > >> and which is directly under the solar vent. The vent itself was dry as
> > >> was
> > >> the ceiling around the vent. The walls were also dry. I dried the
> water
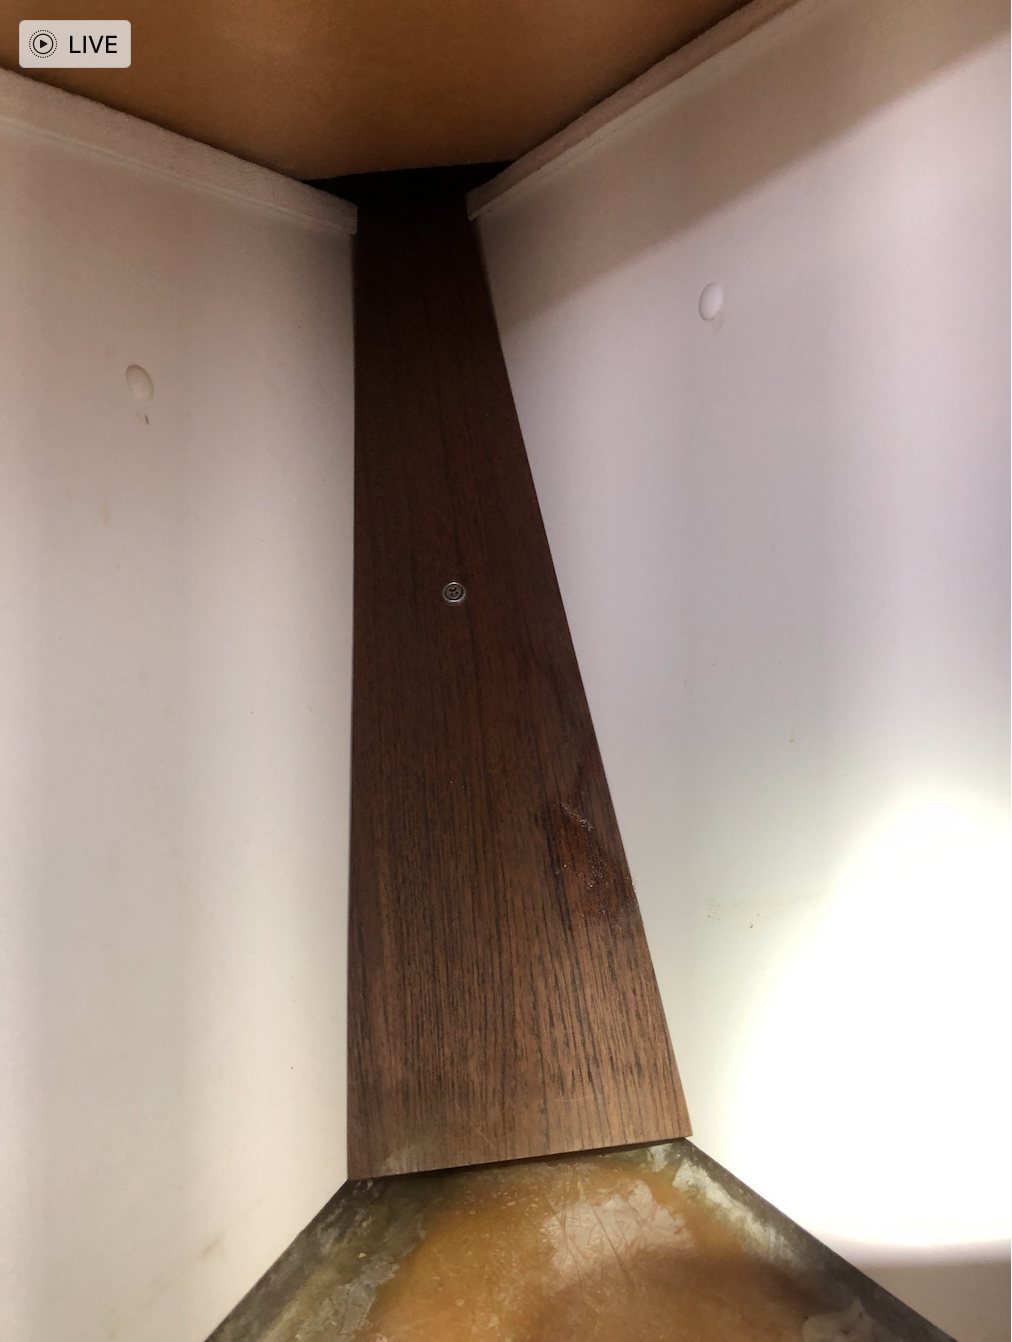
> > >> with a towel and a few hours later a small amount of water seemed to
> be
> > >> seeping under a triangular piece of wood at the very bow of the boat
> > >> (see
> > >> attached photo). I haven't removed that piece of wood yet but I'm
> pretty
> > >> sure I'll find the bolts from the chain plate at the bow for the jib
> > >> stay.
> > >> My feeling now is that the solar vent was never the source of the leak
> > >> but
> > >> I've had a small leak for a while but never noticed because I never
> had
> > >> a
> > >> reason to go up to the very front of the forward cabin. As it turns
> out
> > >> the
> > >> bottom of the cushions, which are rubberized are stained, giving
> > >> evidence
> > >> that the leak is likely long standing.
> > >> Those bolts would be my best guess as the source of the leak but I'd
> > >> look
> > >> forward to suggestions as to where else I might look.
> > >>
> > >> Its always something
> > >>
> > >> --Reuben
> > >>
> > >>
> > >> Reuben Mezrich
> > >> Pelican Cove in Sarasota
> > >> Cell: 410-499-8922
> > >>
> > >> >
> > >> >
> > >> -------------- next part --------------
> > >> A non-text attachment was scrubbed...
> > >> Name: Screen Shot 2021-03-01 at 4.02.36 PM.png
> > >> Type: image/png
> > >> Size: 1826288 bytes
> > >> Desc: not available
> > >> URL: <
> > >>
> >
>http://rhodes22.org/pipermail/rhodes22-list/attachments/20210301/6a1cf705/attachment.png> > >> >
> > >>
> > >>
> > >
> >
> >
> >
>>
×
Message to Webmaster:
To use your email application to send a messsage to the webmaster rather than this form,
.
